Invitation email
When you receive an 'Invitation to set up Patchs for [your practice]' email you should follow the click here link.
This will allow you to create your user account and set up your practice on Patchs:
Please note, the link is valid for 28 days, after which time you will need to request a new invitation from the team at Advanced.
Agreements
You should:
- Confirm that you have read and agree to the GP Staff End User Licence agreement
and - (Optionally) acknowledge the research statement
Then, click the submit button to take you to the page where you can complete your admin user details.
Admin User Details
Complete your user details. Then click the Register button. You should then proceed to setting up your practice details:
Step 1 Enter practice details
Add practice
Update any information where necessary, and complete the following information for your practice:
- Practice name: This will be displayed on your practice's Patchs landing page and to staff and patients when they are logged into Patchs.
- Unique code which shows in the web address for your practice: In the example shown above (unique code - milllanesurgery), the URL of the practice's Patchs landing page would be: https://patchs.ai/practice/milllanesurgery/. The landing page URL is also shown at the bottom of the page.
- GP practice email address: This is the NHS email address that is used to receive electronic correspondence. This email address will be used to send PDF summaries of Patchs requests if they cannot be automatically saved to the clinical system directly.
- Practice phone number: This will be used by Patchs whenever the patient is being advised to contact the practice by telephone.
- Opening hours: This (free text) information is displayed whenever Patchs advises patients of the practice's opening hours. Please make sure that you include days of the week as well as times, for example 'Monday-Friday 8AM-6.30PM'. You can read more about how to do this here.
- Number of working hours after which the patient should call the practice: This will be used by Patchs to advise patients how long they should wait to telephone you if they haven't received a response to their request. This should not be the amount of time it will take to completely resolve their request - it should instead be the amount of time you will take to initially respond to their request. Read more about how to do this here.
- Country: This is used to signpost your patient to the NHS links for your nation.
- The Organisation Code is for information only and is the ODS code for your practice. If the code needs to be updated you should contact the Advanced support team.
- PCN & CCG: You can search for your practice's PCN and the associated CCG details will be updated.
- Clinical System: You can confirm your practice's EHR integration type as part of the practice setup, and once set it will be visible on the 'Edit practice' page.
- Landing page message: here you can add a message that a patient sees when they navigate to your practice's 'Welcome to Patchs' page. It can be left blank at this stage and updated later from the landing page section of the practice details page if required.
Click Submit to confirm your practice details.
You will be asked to confirm that you've selected the correct clinical system:
Step 2 Set up your account
Select your role at the practice (and optionally your professional registration number) and click Register.
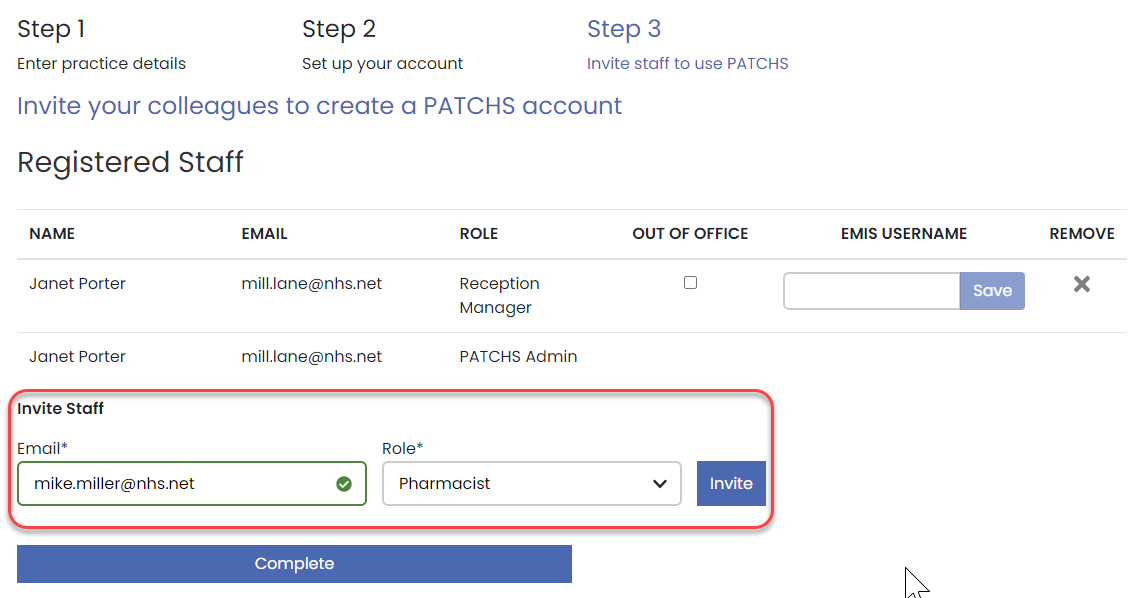
Step 3 Inviting GPs and Staff
Invite other staff users
- Enter the NHS email address of the person you want to invite to use Patchs.
- Enter their role at your practice. For example, GP, prescriber, receptionist.
- Click ‘Invite.'
You should repeat this process for each member of staff that you wish to invite as part of the initial practice registration process.
Other colleagues can be invited from the 'manage staff' page, as described here.
Staff user completes their registration details
The staff user will receive a Patchs invitation email. It will contain a registration link, as shown below:
When they follow the link they will be asked to complete their registration details.
The staff user should complete all mandatory fields. When they have done this, they should click Create an account.